Version Control with Git
Table of Contents
This material contains a short introduction to the version control system Git. Of the numerous version control systems available (Git, Subversion, CVS, Mercurial, etc.), Git is the most popular. What it lacks in user-friendliness it makes up for in good documentation. We generally find that it is great for:
Collaborating with others on code
Supporting multiple concurrent versions (branches)
Tagging releases or snapshots in time
Restoring previous versions of files
Intuitive web platforms available
After working through this material, students should be able to:
Create a new Git repository hosted on GitHub
Clone a repository, commit and push changes to the repository
Track the history of changes in files in a Git repository
Work collaboratively with others on the content in a Git repository
Demonstrate a basic understanding of forking, branching, and tags
The Basics of Version Control
Version control systems start with a base version of the document and then record changes you make each step of the way. You can think of it as a recording of your progress: you can rewind to start at the base document and play back each change you made, eventually arriving at your more recent version.

Changes are saved sequentially.
Once you think of changes as separate from the document itself, you can then think about “playing back” different sets of changes on the base document, ultimately resulting in different versions of that document. For example, two users can make independent sets of changes on the same document.

Different versions can be saved.
Unless there are conflicts, you can even incorporate two sets of changes into the same base document.

Multiple versions can be merged.
A version control system is a tool that keeps track of these changes for us, effectively creating different versions of our files. It allows us to decide which changes will be made to the next version (each record of these changes is called a “commit”, and keeps useful metadata about them. The complete history of commits for a particular project and their metadata make up a “repository”. Repositories can be kept in sync across different computers, facilitating collaboration among different people.
Set up Git / GitHub
Git
When we use Git on a new machine for the first time, we need to configure a few things. Below are a few examples of configurations we will set as we get started with Git:
Our name and email address,
Default main branch name,
And that we want to use these settings globally (i.e. for every project).
Git comes with a nice command line interface to help configure, and to navigate
and perform all of the version control features. The command line interface
takes the form git verb, where verb is what we actually want to do.
To get started with an example, log on to Frontera and check which version of
Git is in your PATH.
[local]$ ssh username@frontera.tacc.utexas.edu   # use your account
(enter password)
(enter token)

[fta]$ which git
/opt/apps/git/2.24.1/bin/git
[fta]$ git version
git version 2.24.1
Since you are the only one who can log in to Frontera with your username, it is safe and reasonable to configure Git globally with your name and e-mail address:
[fta]$ git config --global user.name "Joe Allen"
[fta]$ git config --global user.email "wallen@tacc.utexas.edu"
[fta]$ git config --global init.defaultBranch main
Please use your own name and email address. This user name and email will be associated with your subsequent Git activity, which means that any changes pushed to GitHub, Bitbucket, GitLab or another Git host server in the future will include this information.
EXERCISE
Type
git helpon the command line and take a few minutes to read the help text.
GitHub
GitHub is a web platform where you can host and share Git repositories (“repos”). Repositories can be public or private. Much of what we will do with this section requires you to have a GitHub account. First sign up for a GitHub account:
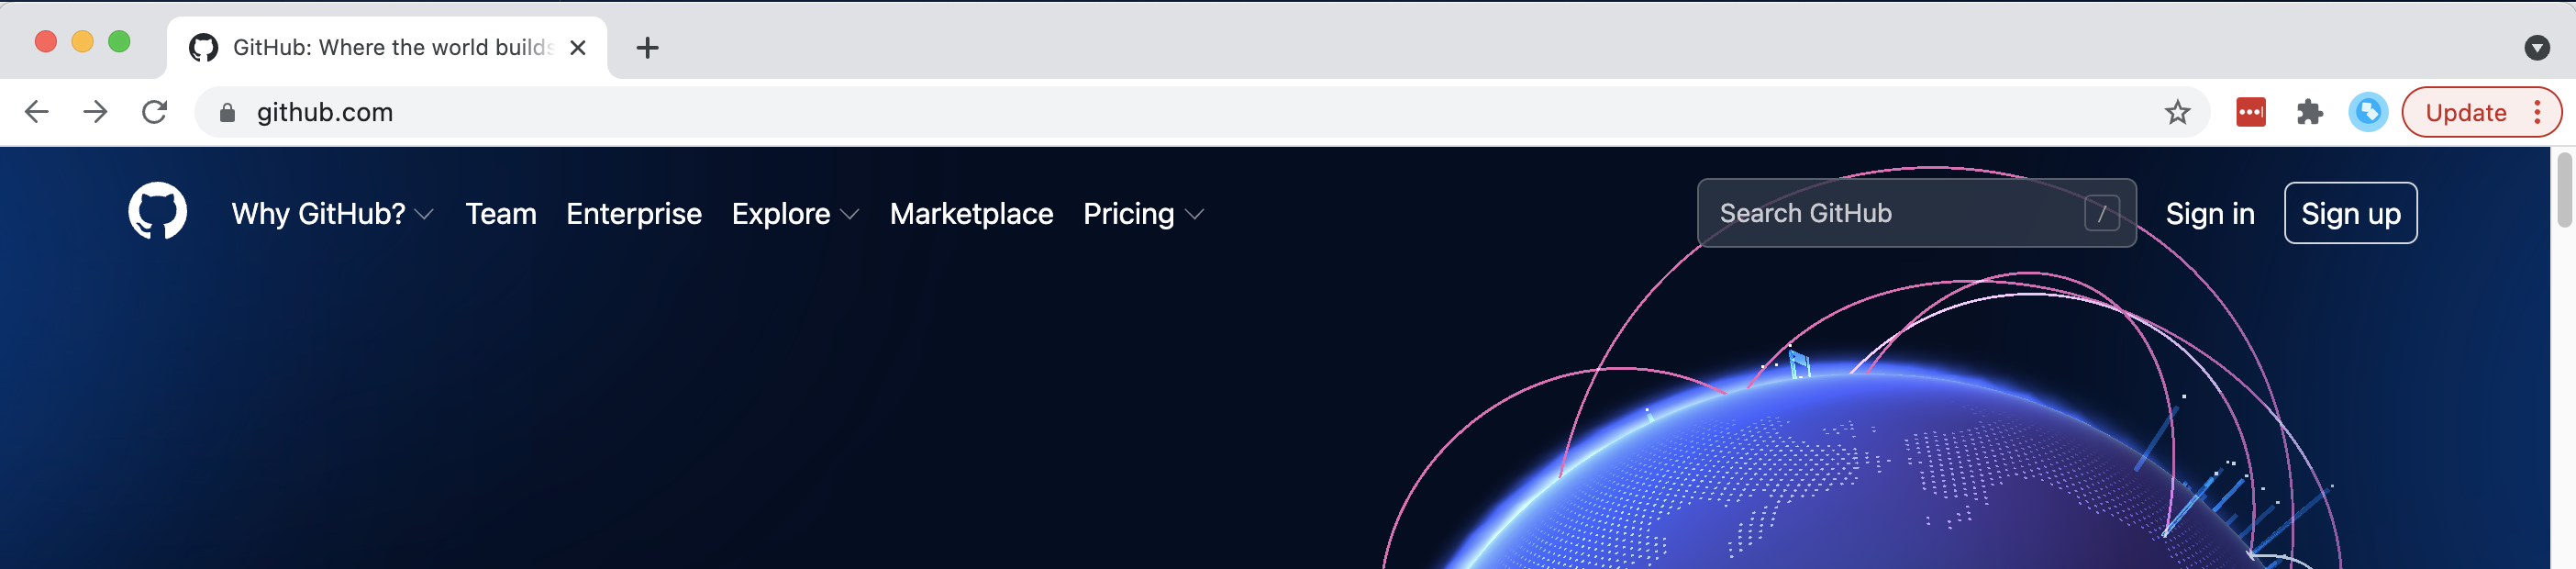
Click on ‘Sign up’ in the top right
GitHub has recently gotten more serious about security. Simple username / password authentication is no longer accepted from the Git command line. The easiest way to authenticate with GitHub via the command line is with SSH keys. Once logged in to GitHub, click on your avatar in the top right corner, choose “Settings”, and choose “SSH and GPG keys”:
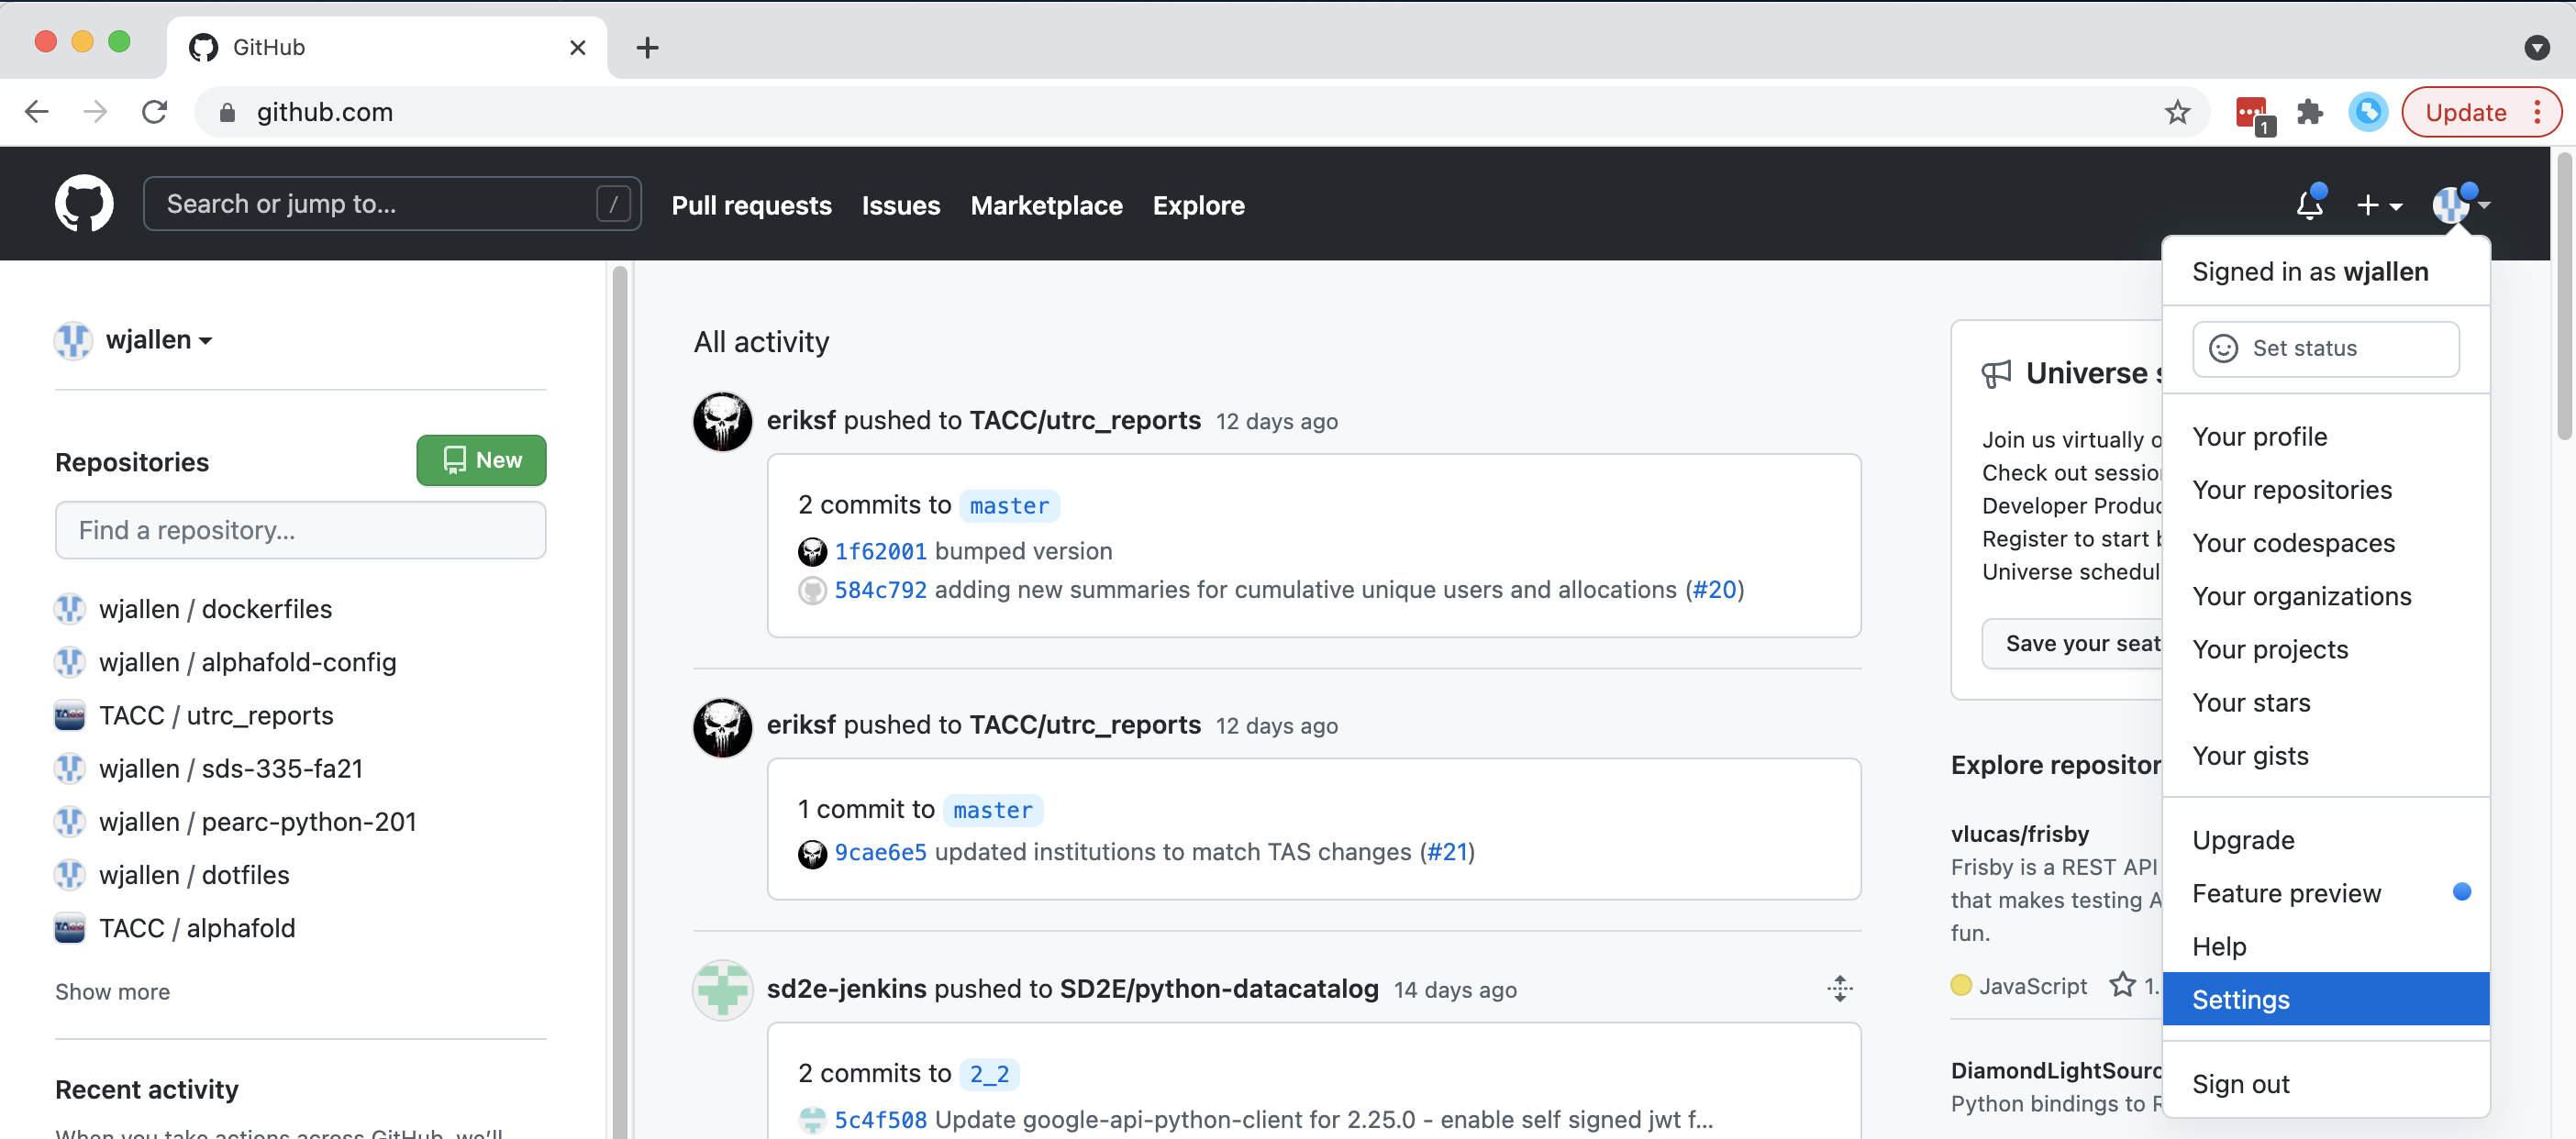
Click on your avatar in the top right, then ‘Settings’
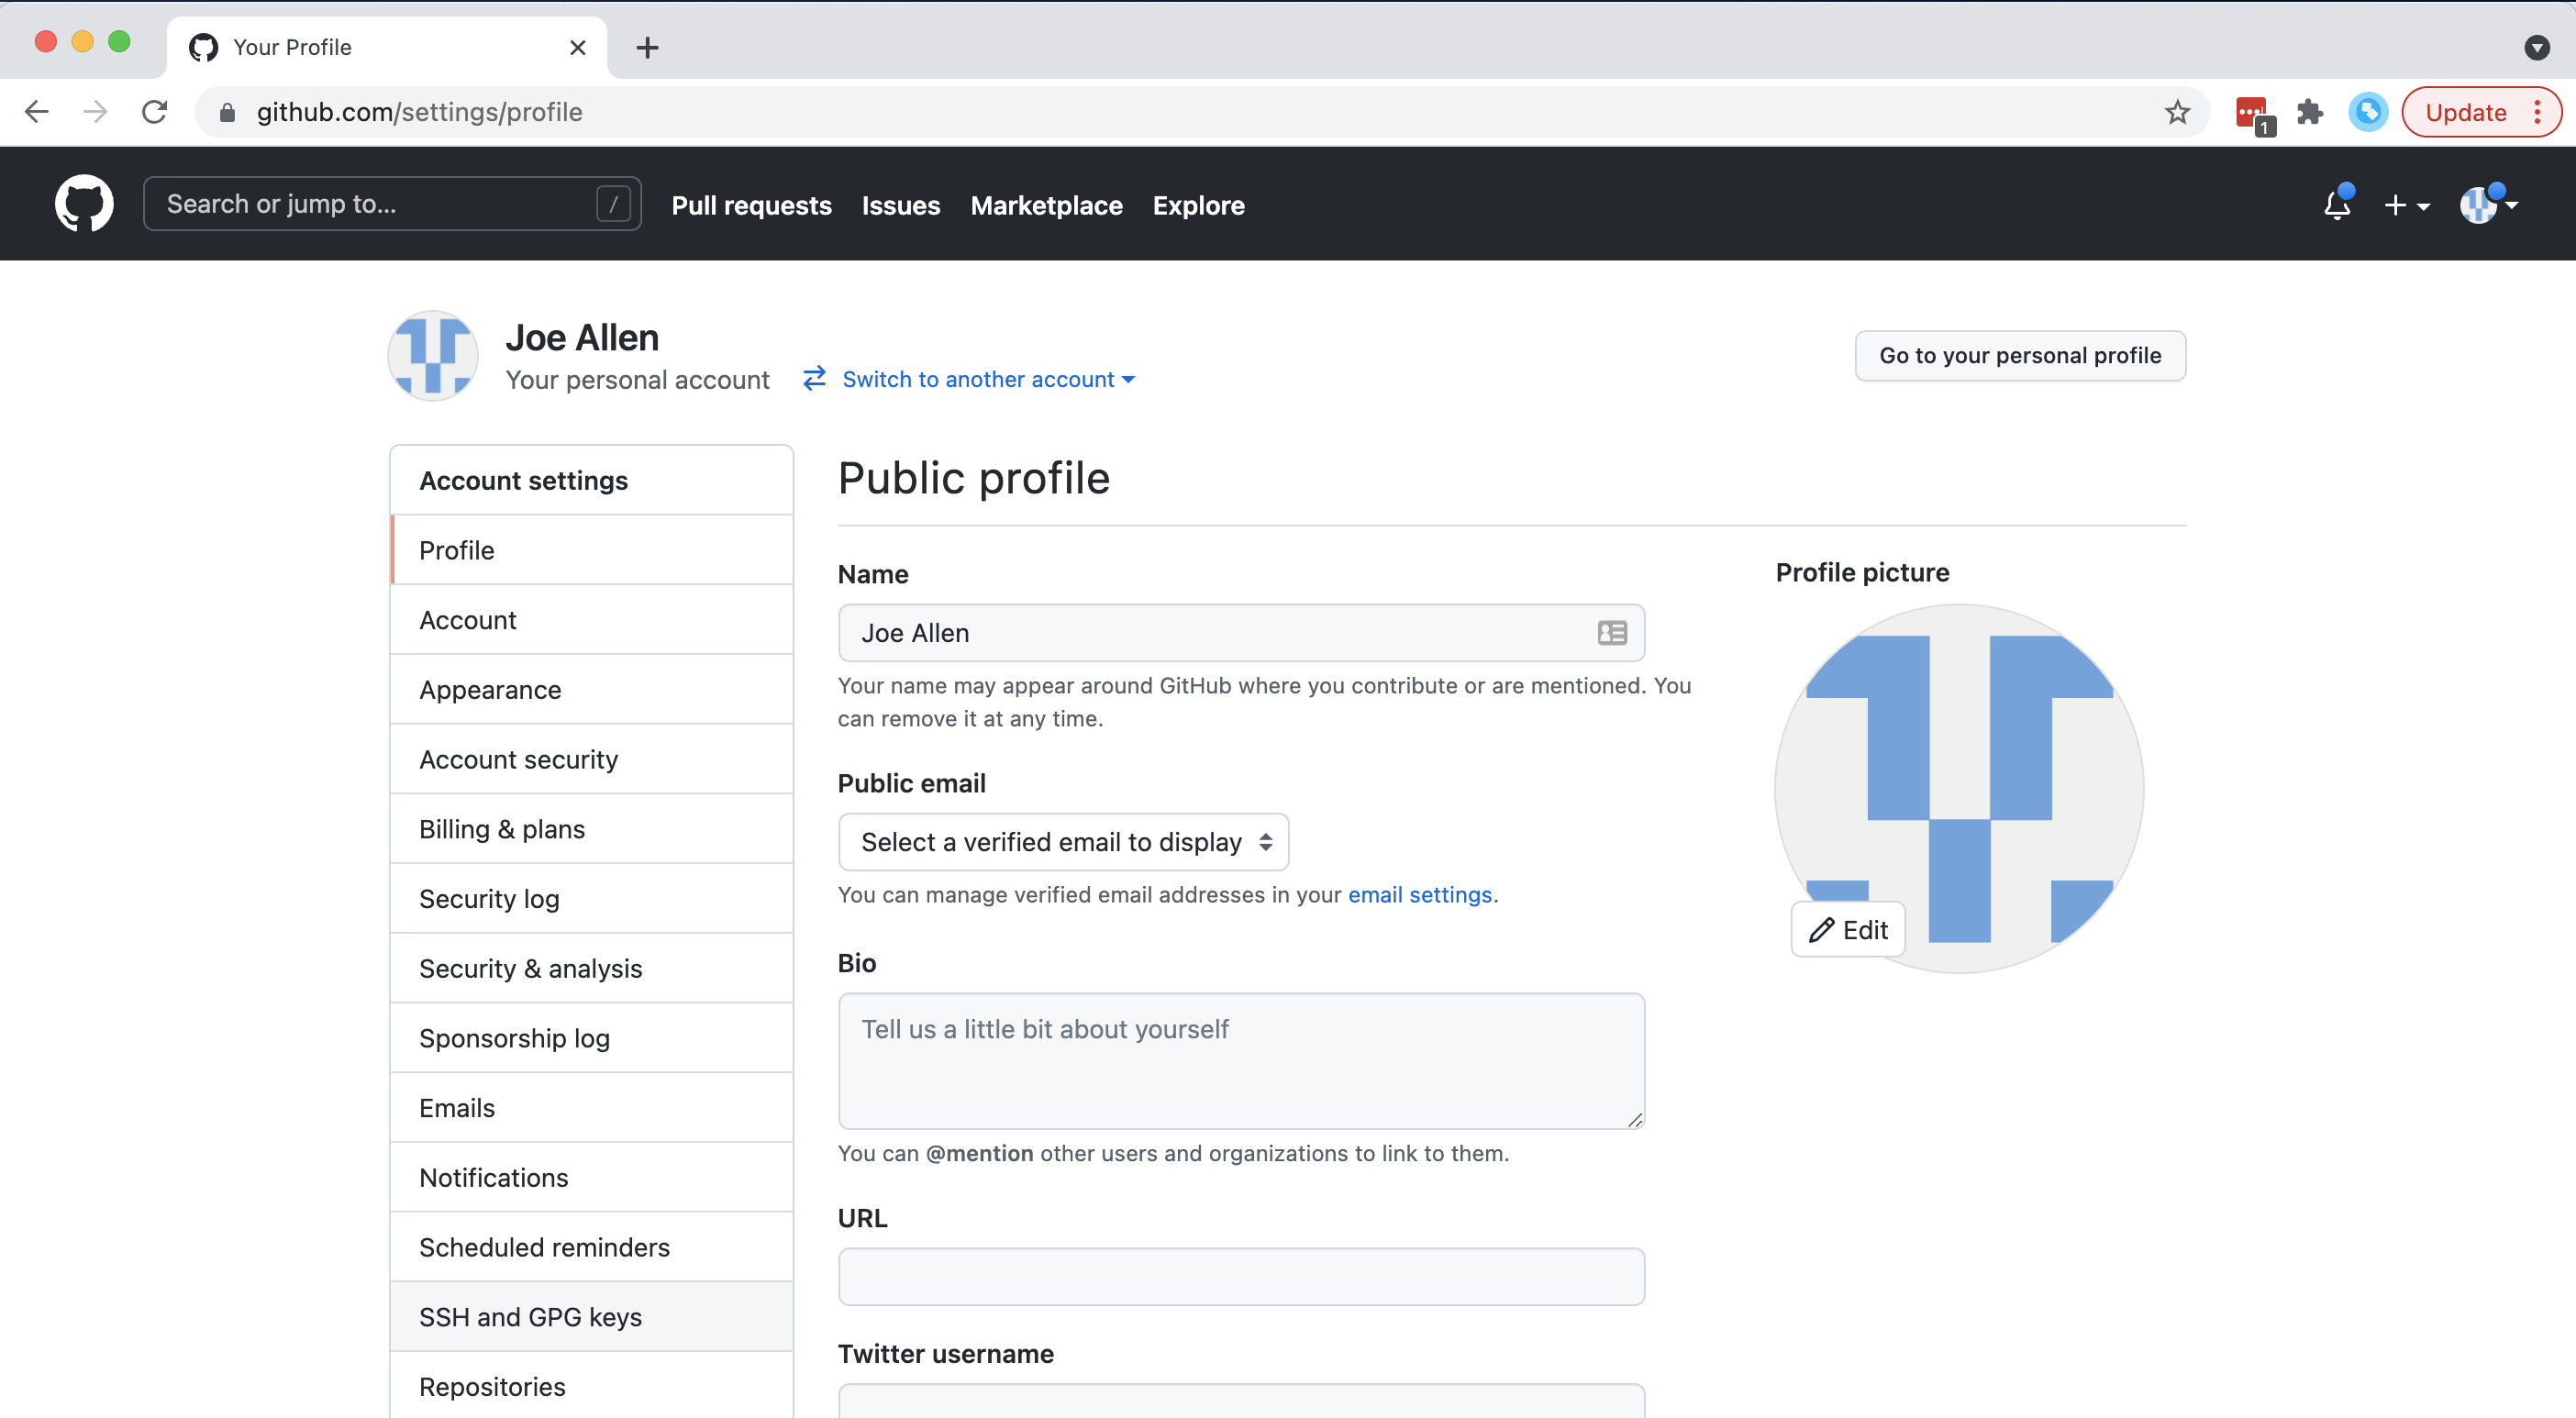
Click on ‘SSH and GPG keys’ on the left-hand side
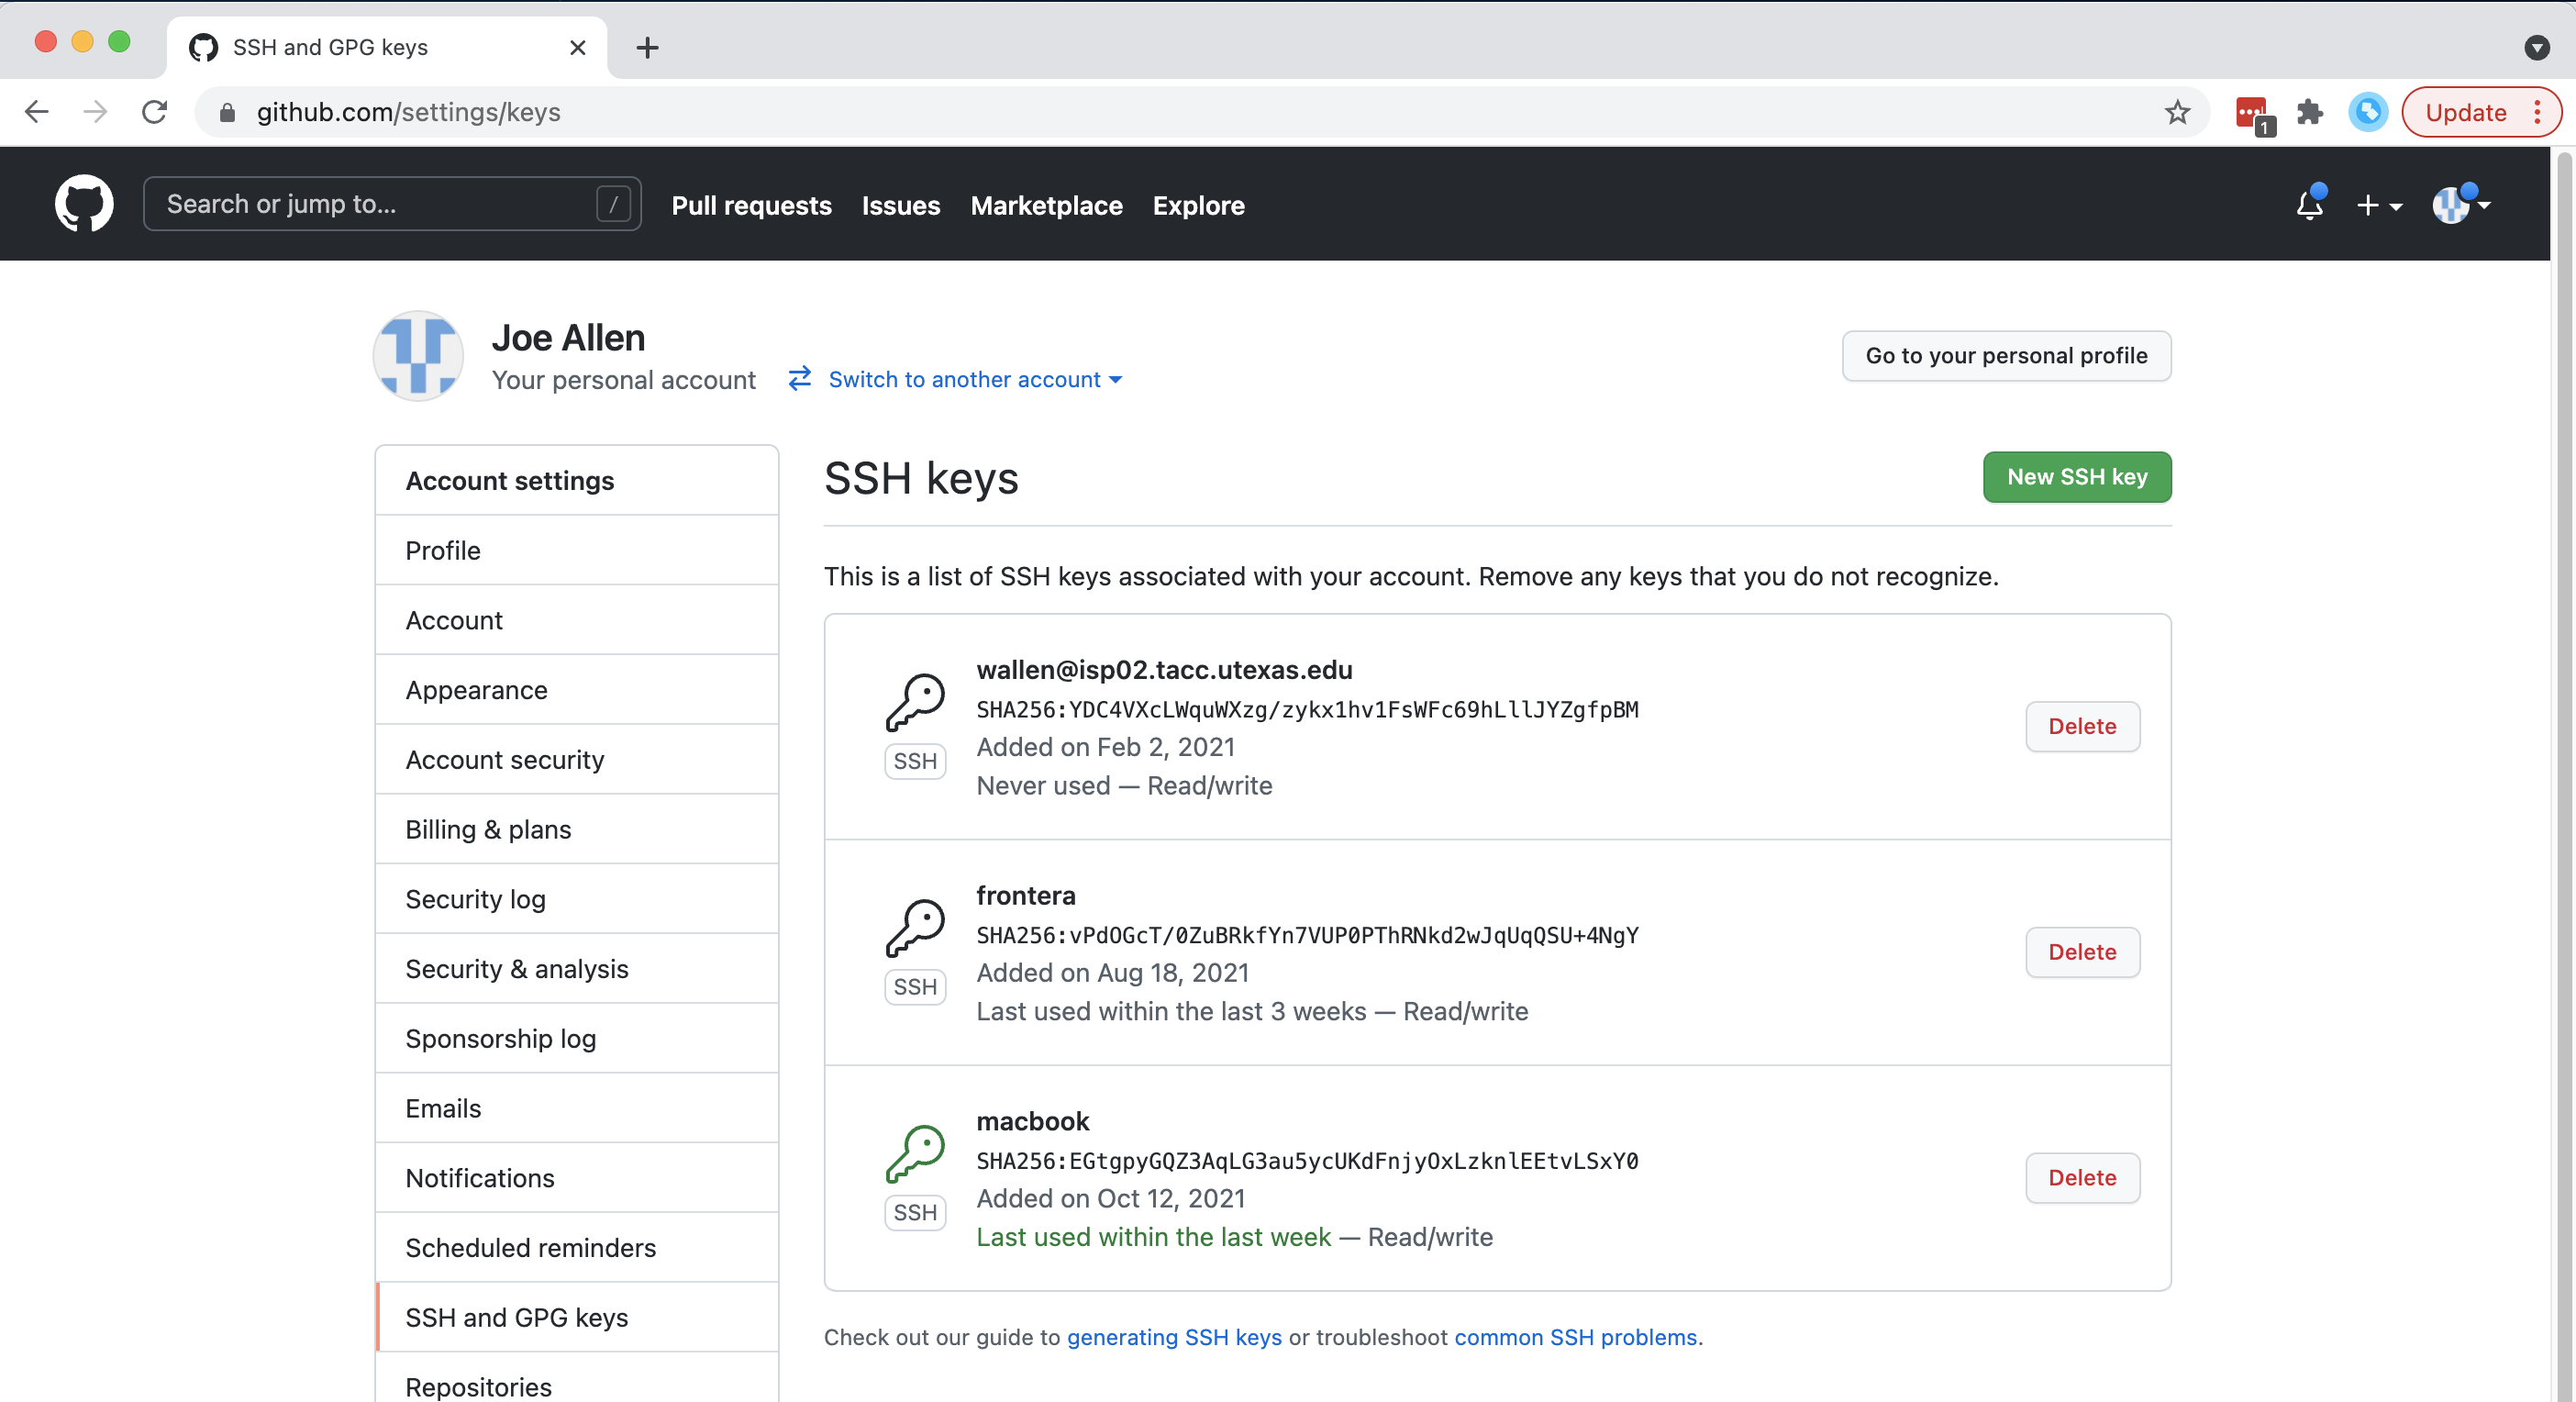
Click on ‘New SSH Key’
Back on Frontera, you will need to grab a copy of your SSH public key and paste it into the GitHub key manager. To find the public key on Frontera, execute:
[fta]$ cat ~/.ssh/id_rsa.pub
ssh-rsa AAAAB3NzaC1yc2EAAAADAQABAAABAwhWa3/RZwaTrAqXE/VnUsTry3N9MCGXPvRLRj+R
TtbANqFg00VR0bAvKTQVd0c3tGmx3Hmbg58JRd0og49HHC3U0v+CiFw6UFk/8S8bJC9VITjkHwy+
HEzDX9UpNrpf1DCuzUH+aP9fkqS/BgMmgjOStObLW4O6vIXoi1Tm/j6NDjrd51B6XwNRZvUarfRM
n6wyBP28K+YzWEabDVucNw0byr9ikGx7xhMtFxwz6k+7AfMepize1zk9WZnp6Z24T+qGU4ulBLIw
3tm+YL8epe6aIFV7J0vV3nb7WG/L0B3NDPl4L wallen@login1.frontera.tacc.utexas.edu
Now you are all ready to interact with the Git repos hosted on GitHub from Frontera.
Tip
A key benefit of Git is that it is platform agnostic. You can use it to interact with the same files from your laptop, from a lab computer, or from a cluster.
Get Started with a New Repository
Let’s create a new directory on Frontera and use Git commands to initialize it as a Git repository.
[fta]$ cd ~/                # cd to your home dir
[fta]$ mkdir my-git-repo/   # make a new dir
[fta]$ cd my-git-repo/      # cd into that new dir
[fta]$ git init             # initialize as a git repo
Initialized empty Git repository in /home1/03439/wallen/my-git-repo/.git/
Now, we have the option to use the version control system Git to track all of the files we create in this directory. Not everything needs to be tracked, but Git will generally be aware of everything in here unless we tell it explicitly to ignore it.
If we use ls -a, we can see that Git has created a hidden directory called
.git:
[fta]$ pwd
/home1/03439/wallen/my-git-repo/
[fta]$ ls -a
./  ../  .git/
Use the find command to get a overview of the contents of the .git/
directory:
[fta]$ find .git/
.git/
.git/description
.git/config
.git/objects
.git/objects/pack
.git/objects/info
.git/hooks
.git/hooks/pre-merge-commit.sample
.git/hooks/pre-rebase.sample
.git/hooks/prepare-commit-msg.sample
.git/hooks/update.sample
.git/hooks/applypatch-msg.sample
.git/hooks/pre-applypatch.sample
.git/hooks/pre-commit.sample
.git/hooks/commit-msg.sample
.git/hooks/post-update.sample
.git/hooks/fsmonitor-watchman.sample
.git/hooks/pre-push.sample
.git/hooks/pre-receive.sample
.git/refs
.git/refs/tags
.git/refs/heads
.git/HEAD
.git/info
.git/info/exclude
.git/branches
Git uses this special sub-directory to store all the information about the
project, including all the history of changes to all files located within the
project directory and subdirectories. If we ever delete the .git directory,
we will lose the project’s history. We can check that everything is set up
correctly by asking Git to tell us the status of our project:
[fta]$ git status
On branch master

No commits yet

nothing to commit (create/copy files and use "git add" to track)
Although we configured Git to use the default branch name main, it seems that does not work until version 2.28.0! To rename the base branch, do:
[fta]$ git checkout -b main
[fta]$ git status
On branch main

No commits yet

nothing to commit (create/copy files and use "git add" to track)
Note
If you are using a different version of git, the exact wording of the
output might be slightly different. Make sure you are not using a really old
version (< ~2.24) if you want to take advantage of all the features.
EXERCISE
Take a few minutes to explore the files and folders in the
.git/directory.
Tracking Changes
We will use this repository to track some simple code we are about to write. Above, Git mentioned that it did not find anything to commit. Let’s create a new file to start tracking. Use your favorite text editor to create an easy “Hello, world!” script in C++:
1 #include <iostream>
2 using namespace std;
3
4 int main() {
5
6         cout << "Hello, world!" << endl;
7         return 0;
8 }
If we now check the status again, Git informs you that there is a new, untracked file. And, it provides some simple instructions on how to start tracking this file, making it part of the repository.
[fta]$ pwd
/home1/03439/wallen/my-git-repo/
[fta]$ ls
hello_world.cpp
[fta]$ git status
On branch main

No commits yet

Untracked files:
  (use "git add <file>..." to include in what will be committed)
        hello_world.cpp

nothing added to commit but untracked files present (use "git add" to track)
Use the Git verb add to add the new file to the list of things to track:
[fta]$ git add hello_world.cpp
[fta]$ git status
On branch main

No commits yet

Changes to be committed:
  (use "git rm --cached <file>..." to unstage)
        new file:   hello_world.cpp
Commit Changes to the Repo
Git now knows that it’s supposed to keep track of hello_world.cpp, but it
hasn’t recorded these changes as a commit yet. To get it to do that, we need to
run one more command:
[fta]$ git commit -m "started tracking hello world program"
[main (root-commit) 50b4adc] started tracking hello world program
 1 file changed, 8 insertions(+)
 create mode 100644 hello_world.cpp
When we run git commit, Git takes everything we have told it to save by
using git add and stores a copy permanently inside the special .git
directory. This permanent copy is called a “commit” (or “revision”) and its
short identifier is 50b4adc. Your commit will have a different identifier.
We use the -m flag (“m” for “message”) to record a short, descriptive, and
specific comment that will help us remember later on what we did and why. Good
commit messages start with a brief (<50 characters) statement about the changes
made in the commit. Generally, the message should complete the sentence “If
applied, this commit will” <commit message here>. If you want to go into more
detail, add a blank line between the summary line and your additional notes. Use
this additional space to explain why you made changes and/or what their impact
will be.
If we run git status now:
[fta]$ git status
On branch main
nothing to commit, working tree clean
EXERCISE
Create a
Makefilefor compiling yourhello_world.cppprogram. Test to make sure it works. Then, usegit add <file>followed bygit commit -m "descriptive message"to commit the Makefile to the repo. Also, do agit statusin between each command.
Review the Project History
If we want to know what we’ve done recently, we can ask Git to show us the
project’s history using git log:
[fta]$ git log
commit 2f7308543b4b339546cc680563606d9c9de87b97 (HEAD -> main)
Author: Joe Allen <wallen@tacc.utexas.edu>
Date:   Tue Oct 26 11:32:20 2021 -0500

    adding Makefile

commit 50b4adc9086dfe12d5c7ec8e1e2c8b2fd26d5455
Author: Joe Allen <wallen@tacc.utexas.edu>
Date:   Tue Oct 26 11:29:10 2021 -0500

    started tracking hello world program
The command git log lists all commits made to a repository in reverse
chronological order. The listing for each commit includes:
the commit’s full identifier (which starts with the same characters as the short identifier printed by the
git commitcommand earlier),the commit’s author,
when it was created,
and the log message Git was given when the commit was created.
Add to the Repo
Let’s now suppose we want to add another program to this repository. Consider the following short program for estimating the value of pi:
 1 #include <iostream>
 2 #include <random>
 3 #include <time.h>
 4 using namespace std;
 5
 6 int main() {
 7
 8         int attempts=1000;
 9         int tries=0;
10         int inside=0;
11         double ratio=0;
12         srand(time(NULL));
13
14         while (tries < attempts) {
15                 tries++;
16                 if (pow(rand()/double(RAND_MAX),2) +
17                     pow(rand()/double(RAND_MAX),2) < 1){
18                         inside++;
19                 }
20         }
21
22         ratio=4*(double(inside)/double(tries));
23         cout << "Final pi estimate from " << attempts
24              << " attempts is " << ratio << endl;
25 }
Copy the code above into a new file, e.g. pi_estimator.cpp. Compile the code
to make sure it works, then git add and git commit in sequence.
EXERCISE
The above example uses 1000 random points within a unit square to estimate the value of pi. You feel that 1000 is not very many, and you may get a better estimate with more points. Use your favorite text editor to change the number of
attemptsfrom 1000 to1000000, then recompile and make sure the code still works. If you are happy with the result,git addandgit committhe changes.
Check for File Changes
If you made a change in the pi_estimator.pi program, when you run
git status it tells you that a file it already knows about has been modified:
[fta]$ git status
On branch main
Changes not staged for commit:
  (use "git add <file>..." to update what will be committed)
  (use "git restore <file>..." to discard changes in working directory)
        modified:   pi_estimator.cpp

no changes added to commit (use "git add" and/or "git commit -a")
The last line is the key phrase: “no changes added to commit”. We have changed
this file, but we haven’t told Git we will want to save those changes (which we
do with git add) nor have we saved them (which we do with git commit).
So let’s do that now. It is good practice to always review our changes before
saving them. We do this using git diff. This shows us the differences
between the current state of the file and the most recently saved version:
[fta]$ git diff pi_estimator.cpp
diff --git a/pi_estimator.cpp b/pi_estimator.cpp
index 7244743..2c0f39b 100644
--- a/pi_estimator.cpp
+++ b/pi_estimator.cpp
@@ -5,7 +5,7 @@ using namespace std;

 int main() {

-       int attempts=1000;
+       int attempts=10000000;
        int tries=0;
        int inside=0;
        double ratio=0;
The output is a bit cryptic because it is actually a series of commands for
tools like patch telling them how to reconstruct one file given the other.
If we break it down into pieces:
The first line tells us that Git is producing output similar to the Unix
diffcommand comparing the old and new versions of the file.The second line tells exactly which versions of the file Git is comparing:
7244743and2c0f39bare unique computer-generated labels for those versions.The third and fourth lines once again show the name of the file being changed.
The remaining lines are the most interesting, they show us the actual differences and the lines on which they occur. In particular, the
+marker in the first column shows where we added lines.
After reviewing our change, it’s time to commit it:
[fta]$ git add pi-estimator.cpp
[fta]$ git commit -m "increasing the number of attempts"
[main 9a1578f] increasing the number of attempts
 1 file changed, 1 insertion(+), 1 deletion(-)
Git insists that we add files to the set we want to commit before actually committing anything. This allows us to commit our changes in stages and capture changes in logical portions rather than only large batches. As the classic Git saying goes: Commit early, commit often.
EXERCISE
Add another target to the
Makefilefor compiling thepi_estimator.cppprogram. Test it out, thengit addandgit commitin sequence.
Directories in Git
There are a couple important facts you should know about directories in Git. First, Git does not track directories on their own, only files within them. Try it for yourself:
[fta]$ mkdir directory
[fta]$ git status
[fta]$ git add directory
[fta]$ git status
Note, our newly created empty directory directory does not appear in the
list of untracked files even if we explicitly add it (via git add) to our
repository.
Second, if you create a directory in your Git repository and populate it with files, you can add all files in the directory at once by:
[fta]$ git add <directory-with-files>
Tip
A trick for tracking an empty directory with Git is to add a hidden file to
the directory. People sometimes will label this .gitcanary. Adding and
committing that file to the repo’s history will cause the directory it is in
to also be tracked.
Restore Old Versions of Files
We can save changes to files and see what we’ve changed — now how can we restore older versions of things? Let’s suppose we accidentally overwrite our file:
[fta]$ echo "" > pi_estimator.cpp
[fta]$ cat pi_estimator.cpp                  # oops!
Now git status tells us that the file has been changed, but those changes
haven’t been staged:
[fta]$ git status
On branch main
Changes not staged for commit:
  (use "git add <file>..." to update what will be committed)
  (use "git restore <file>..." to discard changes in working directory)
        modified:   pi-estimator.cpp

no changes added to commit (use "git add" and/or "git commit -a")
We can put things back the way they were by using git checkout and referring
to the most recent commit of the working directory by using the identifier
HEAD:
[fta]$ git checkout HEAD pi_estimator.cpp
Updated 1 path from 4afd949
[fta]$ cat pi_estimator.cpp
#include <iostream>
#include <random>
...etc
As you might guess from its name, git checkout checks out (i.e., restores)
an old version of a file. In this case, we’re telling Git that we want to
recover the version of the file recorded in HEAD, which is the last saved
commit. If we want to go back even further, we can use a commit identifier
instead:
[fta]$ git log
commit 08f311e2e4c9a2c3bc9cc1cb407b6485564e54b3 (HEAD -> main)
Author: Joe Allen <wallen@tacc.utexas.edu>
Date:   Tue Oct 26 12:16:05 2021 -0500

    added target for pi_estimator to Makefile

commit 9a1578fe2211912528e385937390683ae7582816
Author: Joe Allen <wallen@tacc.utexas.edu>
Date:   Tue Oct 26 12:11:59 2021 -0500

    increasing the number of attempts

commit 40017224ec1f35c478779f3388b4ba5c96206c41
Author: Joe Allen <wallen@tacc.utexas.edu>
Date:   Tue Oct 26 12:04:01 2021 -0500

    started tracking pi-estimator program

commit 2f7308543b4b339546cc680563606d9c9de87b97
Author: Joe Allen <wallen@tacc.utexas.edu>
Date:   Tue Oct 26 11:32:20 2021 -0500

    adding Makefile

commit 50b4adc9086dfe12d5c7ec8e1e2c8b2fd26d5455
Author: Joe Allen <wallen@tacc.utexas.edu>
Date:   Tue Oct 26 11:29:10 2021 -0500

    started tracking hello world program
[fta]$ git checkout 2f73085 Makefile
# now you have a copy the earliest version of the Makefile
Again, we can put things back the way they were by using git checkout:
[fta]$ git checkout HEAD *
# back to the most recently committed versions of all files
Link a Local Repository to GitHub
Version control really shows its power when we begin to collaborate with other people. We already have most of the machinery we need to do this; the only thing missing is to copy changes from one repository to another.
Systems like Git allow us to move work between any two repositories. In practice, though, it’s easiest to use one copy as a central hub, and to keep it on the web rather than on someone’s laptop. Most programmers use hosting services like GitHub, Bitbucket, or GitLab to hold those main copies.
Let’s start by sharing the changes we’ve made to our current project with the world. Log in to GitHub, then click on the icon in the top right corner to create a new repository:
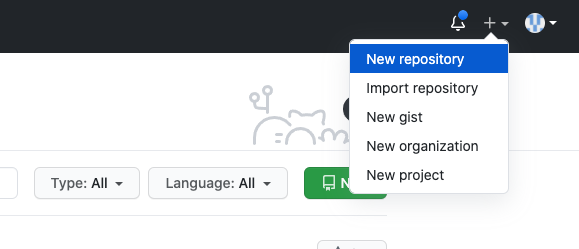
Click ‘New repository’.
As soon as the repository is created, GitHub displays a page with a URL and some
information on how to configure your local repository. Provide a descriptive name
for your new repository like pi-estimator (or whatever you want).
Note that our local repository contains our most recent version of pi_estimator.cpp,
as well as a history of the changes of all of the files in the repo. But, the
remote repository on GitHub doesn’t contain any memory of any files yet. The next
step is to connect the two repositories. We do this by making the GitHub
repository a “remote” for the local repository. The home page of the repository
on GitHub includes the string we need to identify it:
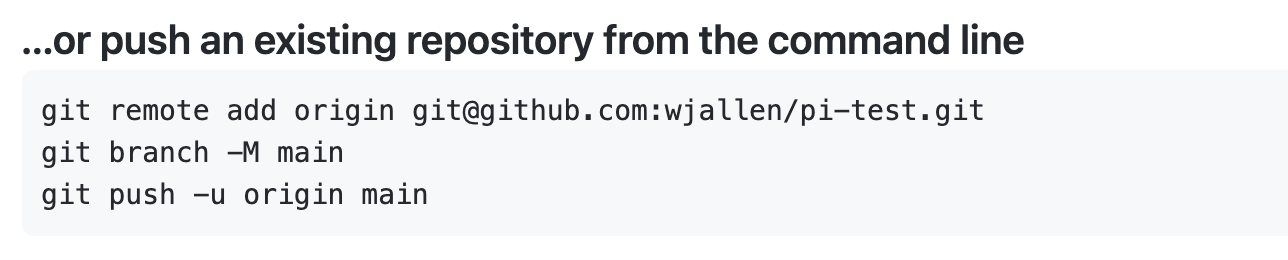
Follow the instructions for pushing an existing repository.
Back on Frontera in the local Git repo, link it to the repo on GitHub and confirm the link was created:
[fta]$ git remote add origin git@github.com:wjallen/pi-estimator.git
[fta]$ git remote -v
origin  git@github.com:wjallen/pi-estimator.git (fetch)
origin  git@github.com:wjallen/pi-estimator.git (push)
Attention
Make sure to use the URL for your repository instead of the one listed here. This will only work if you correctly set up SSH keys.
The name origin is a local nickname for your remote repository. We could use
something else if we wanted to, but origin is by far the most common choice.
Once the nickname origin is set up, this command will push the changes from
our local repository to the repository on GitHub:
[fta]$ git branch -M main
[fta]$ git push -u origin main
Enumerating objects: 15, done.
Counting objects: 100% (15/15), done.
Delta compression using up to 28 threads
Compressing objects: 100% (13/13), done.
Writing objects: 100% (15/15), 1.67 KiB | 284.00 KiB/s, done.
Total 15 (delta 3), reused 0 (delta 0)
remote: Resolving deltas: 100% (3/3), done.
To github.com:wjallen/pi-estimator.git
 * [new branch]      main -> main
Branch 'main' set up to track remote branch 'main' from 'origin'.
Clone the Repository
Spend a few minutes browsing the web interface for GitHub. Now, anyone can make
a full copy of my_first_repo including all the commit history by performing:
[fta]$ git clone git@github.com:wjallen/pi-estimator.git
Cloning into 'pi-estimator'...
remote: Enumerating objects: 15, done.
remote: Counting objects: 100% (15/15), done.
remote: Compressing objects: 100% (10/10), done.
remote: Total 15 (delta 3), reused 15 (delta 3), pack-reused 0
Receiving objects: 100% (15/15), done.
Resolving deltas: 100% (3/3), done.
Collaborate with Others
A public platform like GitHub makes it easier than ever to collaborate with others on the content of a repository. You can have as many local copies of a repository as you want, but there is only one “origin” repository - the repository hosted on GitHub. Other repositories may fall behind the origin, or have changes that are ahead of the origin. A common model for juggling multiple repositories where separate individuals are working on different features is the GitFlow model:
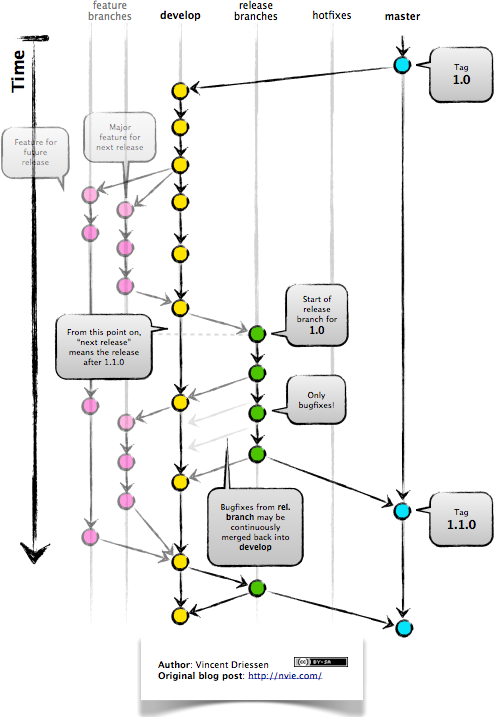
GitFlow model
Some important definitions (most can easily be managed right in the GitHub web interface):
Fork
A fork is a personal copy of another user’s repository that lives on your account. Forks allow you to freely make changes to a project without affecting the original. Forks remain attached to the original, allowing you to submit a pull request to the original’s author to update with your changes. You can also keep your fork up to date by pulling in updates from the original.
Branch
A branch is a parallel version of a repository. It is contained within the repository, but does not affect the primary or main branch allowing you to work freely without disrupting the “live” version. When you’ve made the changes you want to make, you can merge your branch back into the main branch to publish your changes. For more information, see About branches.
Tag
Git has the ability to tag specific points in history as being important. Typically people use this functionality to mark release points (v1.0, and so on).
Pull Request / Merge Request
Pull requests are proposed changes to a repository submitted by a user and accepted or rejected by a repository’s collaborators. Like issues, pull requests ach have their own discussion forum. For more information, see About pull requests.
Other Considerations
Most repos will also contain a few standard files in the top directory, including:
README.md: The landing page of your repository on GitHub will display the contents of README.md, if it exists. This is a good place to describe your project and list the appropriate citations.
LICENSE.txt: See if your repository needs a license here.
Additional Resources
Some of the materials in this module were based on Software Carpentry DOI: 10.5281/zenodo.57467.